
Do you want to build a Paid Membership Site using WordPress?
Creating a Paid Membership Site is one of the best ways to make money online. This recurring revenue model allows you to sell subscription plans to website visitors so that they can access exclusive benefits or content on your site.
In this guide, we will explain why you should create a paid membership site with WordPress using one of the best WordPress membership plugins.
Why You Should Create a Paid Membership Site
Creating a Paid Membership Site is an excellent strategy for monetizing your online presence and building a sustainable income stream. Here are several compelling reasons why you should consider creating a paid membership site;
Generate Recurring Revenue: One of the most significant advantages of a paid membership site is the ability to generate recurring revenue. You can create a predictable income stream that grows over time by offering valuable content or services behind a paywall. For example, a fitness instructor could offer exclusive workout videos and personalized training plans to members monthly, ensuring a steady flow of income while providing ongoing value to subscribers.
Build a Community: Paid membership sites offer a unique opportunity to cultivate a loyal community around your brand or niche. Members are often willing to invest in access to exclusive content or forums to interact with like-minded individuals and access personalized support. For instance, a cooking enthusiast could create a paid membership site offering cooking tutorials, recipe exchanges, and live Q&A sessions, fostering a vibrant community of passionate foodies eager to learn and share their culinary experiences.
Diversify Revenue Streams: Building a paid membership site allows you to diversify your revenue streams and reduce reliance on traditional forms of monetization such as advertising or sponsored content. Instead of solely relying on fluctuating ad revenue, you can create a stable income stream through membership subscriptions, providing greater financial stability and flexibility for your business or brand.
Scale Your Business: As your paid membership site grows and attracts more members, you can scale your business and expand your offerings. You can introduce new membership tiers, add premium content or services, collaborate with other experts or businesses, or explore new monetization strategies.
Creating a Paid Membership Site With WordPress
Numerous platforms are available for creating membership sites, and many of them have limitations. However, WordPress stands out as a powerful and accessible solution for monetizing your online content or services. With its user-friendly interface and extensive plugin ecosystem, WordPress provides the necessary tools to efficiently build and manage a membership site.
In this guide, our focus is on demonstrating how to create a WordPress paid membership site using the ProfilePress Plugin. This plugin offers an all-in-one solution that allows you to create various membership tiers, restrict content based on membership plans and user roles, and seamlessly integrate popular payment methods such as PayPal, Mollie, Paystack, and Stripe.
Designed with beginners in mind, ProfilePress is suitable for individuals with minimal technical knowledge or programming skills. If you can navigate social media platforms like Facebook, you can quickly learn to use ProfilePress to set up your membership site.
Here’s what you need to do to get started:
Install the ProfilePress Plugin
Visit the ProfilePress website to purchase the plugin. Once you’ve completed the purchase, access the account section on the ProfilePress website to download the ZIP file containing the plugin.
After downloading the ZIP file to your computer, navigate to your WordPress dashboard.
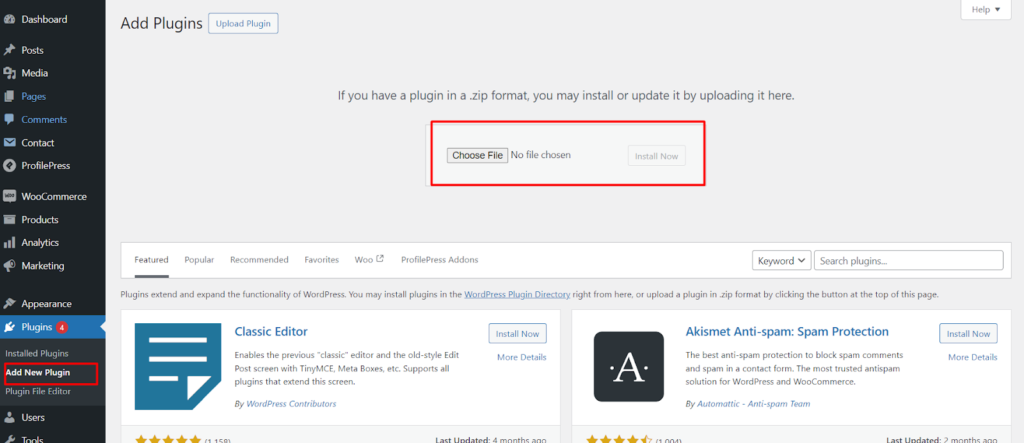
Within the WordPress dashboard, locate the Plugins page and click on it. On the Plugins page, select the option to Add New.
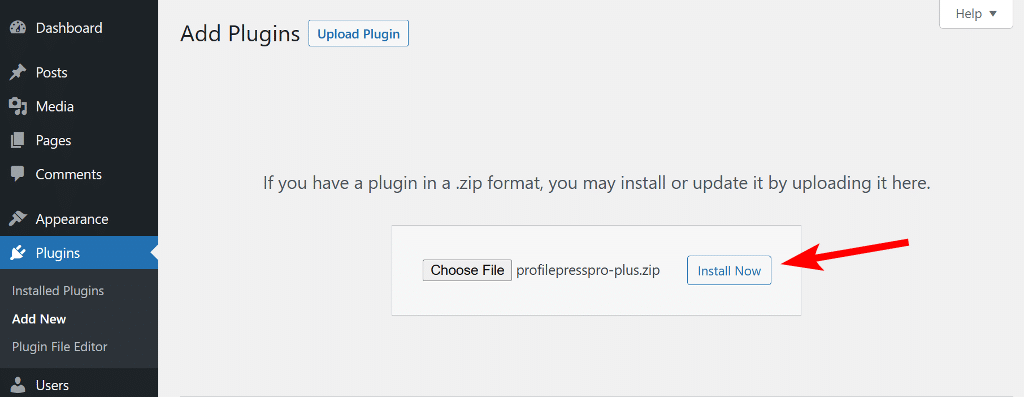
From the Add New page, click on the Upload Plugin button. Then, proceed by dragging and dropping the previously downloaded plugin ZIP file into the designated area.
Once the file is uploaded, click on the Install Now button. After installation, activate the plugin by clicking on the Activate button.
Now that you’ve installed the ProfilePress plugin on your WordPress site, the next thing to do is to create membership plans.
How To Create Paid Plans For Your Membership Plans
ProfilePress lets you create both one-time payment plans and recurring subscription plans.
How To Create a One-Time Payment Plan
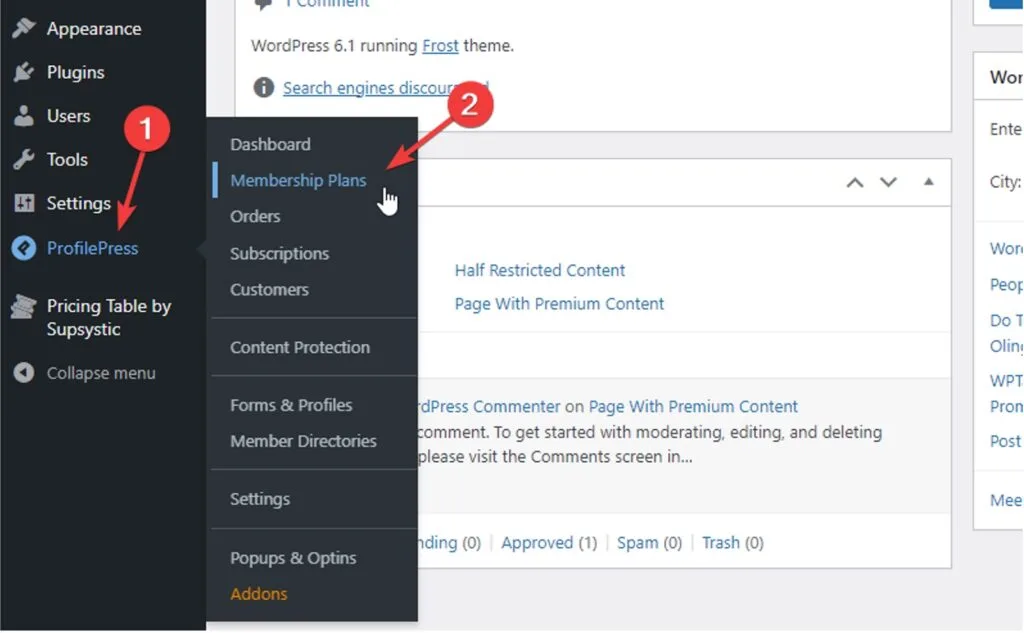
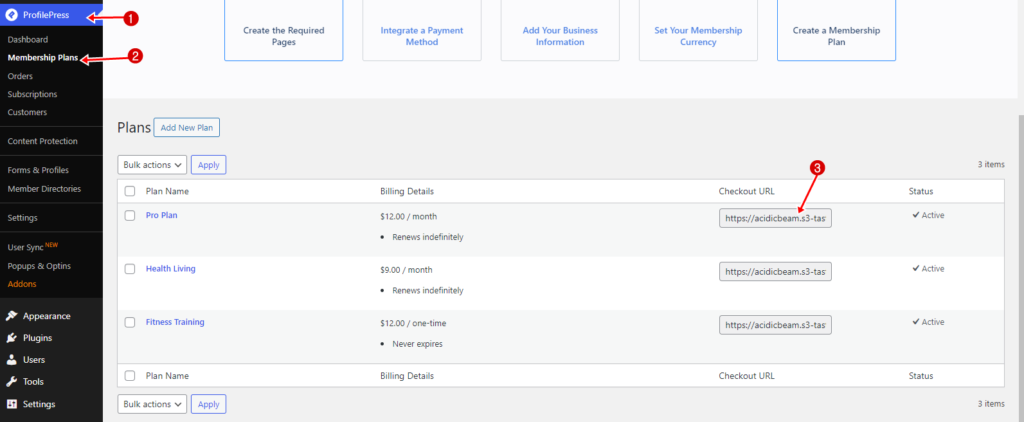
To create a one-time plan, log into your WordPress website’s dashboard and go to the Membership Plans section of ProfilePress.
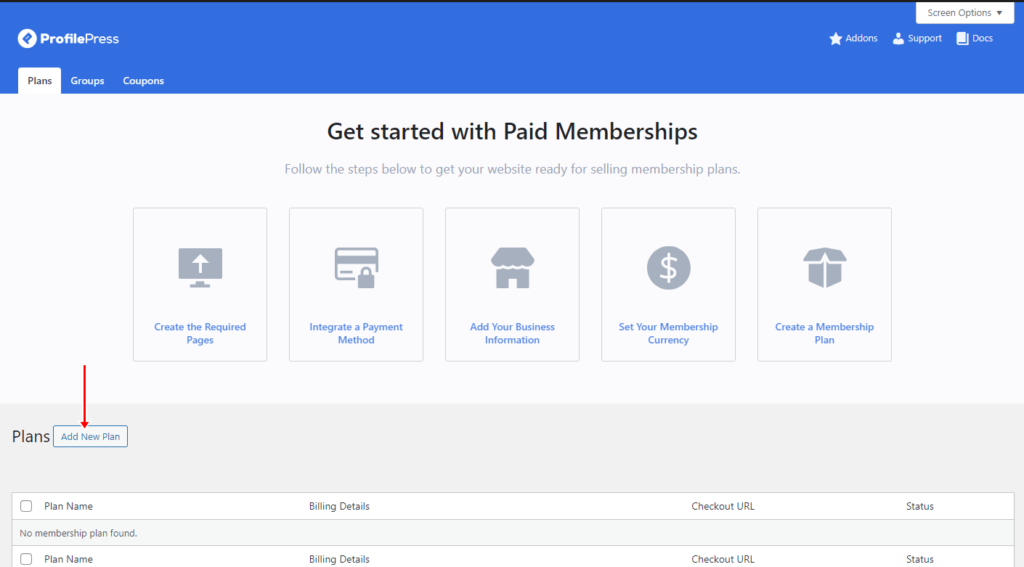
Click the Add New Plan button:
You’ll be directed to the ProfilePress new plan creator:
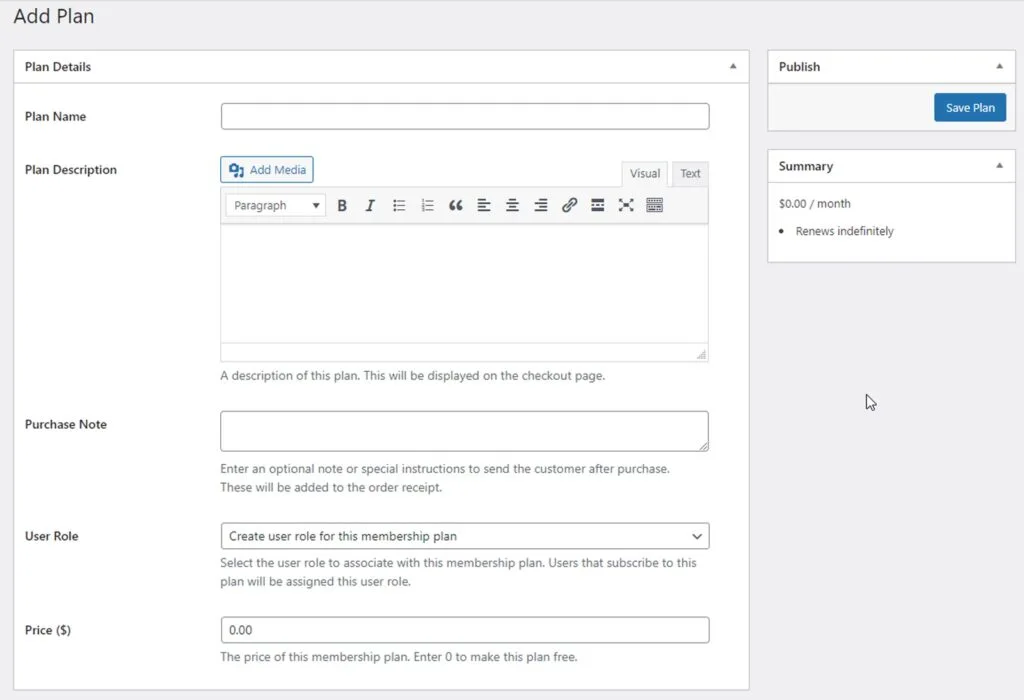
In the first section, Plan Details, start by filling out your plan information and adding a brief, clear description. You can also include a Purchase Note to express your gratitude or provide usage instructions. This note will be sent to your customers via email, along with their order receipt when they purchase this plan.
Next, select the user role associated with the membership plan. For instance, it’s recommended to choose “create a user role for this membership plan” to assign a new role to members automatically. This new user role simplifies managing new members who join membership plans.
Then, set the price for this plan. This is the amount users will need to pay to access the plan.
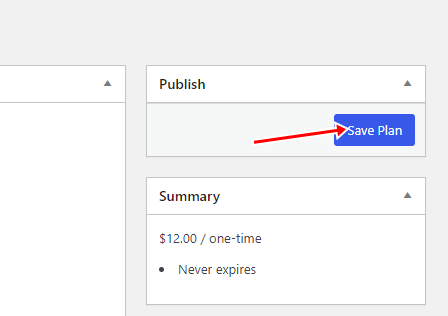
Scrolling down, you’ll come across a section titled Subscription Settings:

Adjust the billing frequency to “one-time” to create a plan for a single payment. Then, press the “Save Plan” button.
How To Create a Recurring Payment Plan
Start by creating a new plan, as you did in the previous section.
Once you’ve begun the plan creation process, navigate to the Subscription Settings section by scrolling down the page.

To set up your plan, use the Billing Frequency field to choose how often your customers will be billed. Options include Daily, Weekly, Monthly, Quarterly, Bi-Annually, or Annually.
If you wish, you can add a sign-up fee by entering the amount in the Sign-Up Fee ($) field. This one-time fee is charged to customers when they first sign up in addition to the first month’s charge.
You also have the option to offer a free trial to your customers. During the trial period, they won’t be charged. If they cancel before the trial ends, they won’t be charged.
Once you’ve set everything up as you want it, click the Save Plan button to activate your recurring subscription plan.
How To Connect a Payment Gateway
ProfilePress is very modular and flexible when it comes to payments, so you can use more than one payment system at the same time.
What is CryptoPay?
With CryptoPay, you can receive crypto payments from supported blockchain networks such as Bitcoin, Solana, Tron, especially EVM-based blockchain networks, and the currencies (tokens) under these networks. It can be integrated with all WordPress plugins thanks to its API.
Installation CryptoPay
For the installation of CryptoPay, you can use their documentation by following the link below. It is very clearly explained step by step.
Installation: https://beycanpress.gitbook.io/cryptopay-docs/overview/installation
Assuming that you have read CryptoPay’s documentation and made the settings, we continue.
Installation CryptoPay ProfilePress Integration
As we mentioned in the description, CryptoPay is a cryptocurrency payment gateway that runs on your WordPress and can integrate with any plugin.
So in this case, the first thing you need to do is to download the ProfilePress integration via the link below.
ProfilePress Integration: https://beycanpress.com/product/profilepress-integration/
Step – 1
Install the Zip file you downloaded as a normal plugin.
Step – 2
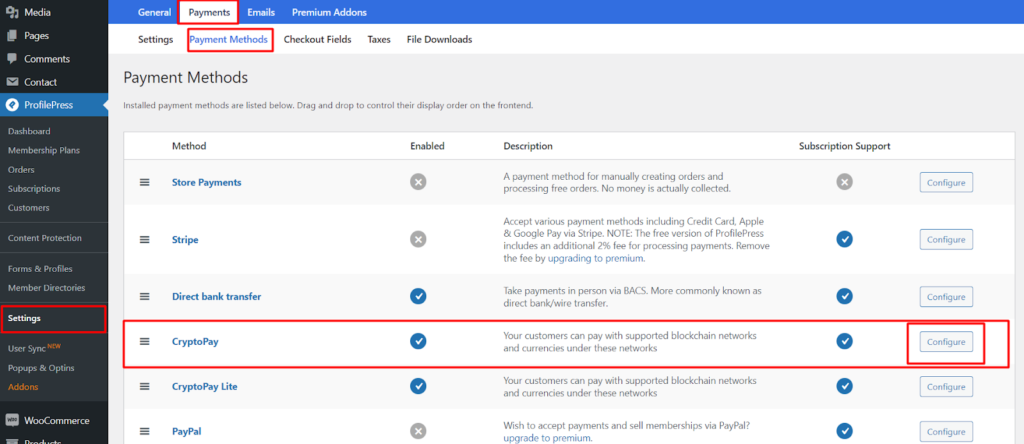
After that, all you need to do is to enable CryptoPay by going to ProfilePress -> Settings -> Payments -> Payment Methods from the menu.
That’s it. That’s it. You can now start accepting crypto payments with ProfilePress.
IMPORTANT: The Checkout Page
ProfilePress generates a checkout page for every plan you create, whether recurring or one-time. You can access the link to this checkout page directly from the Membership Plans section.
When you open the checkout link, you’ll be directed to a checkout page that looks like this:
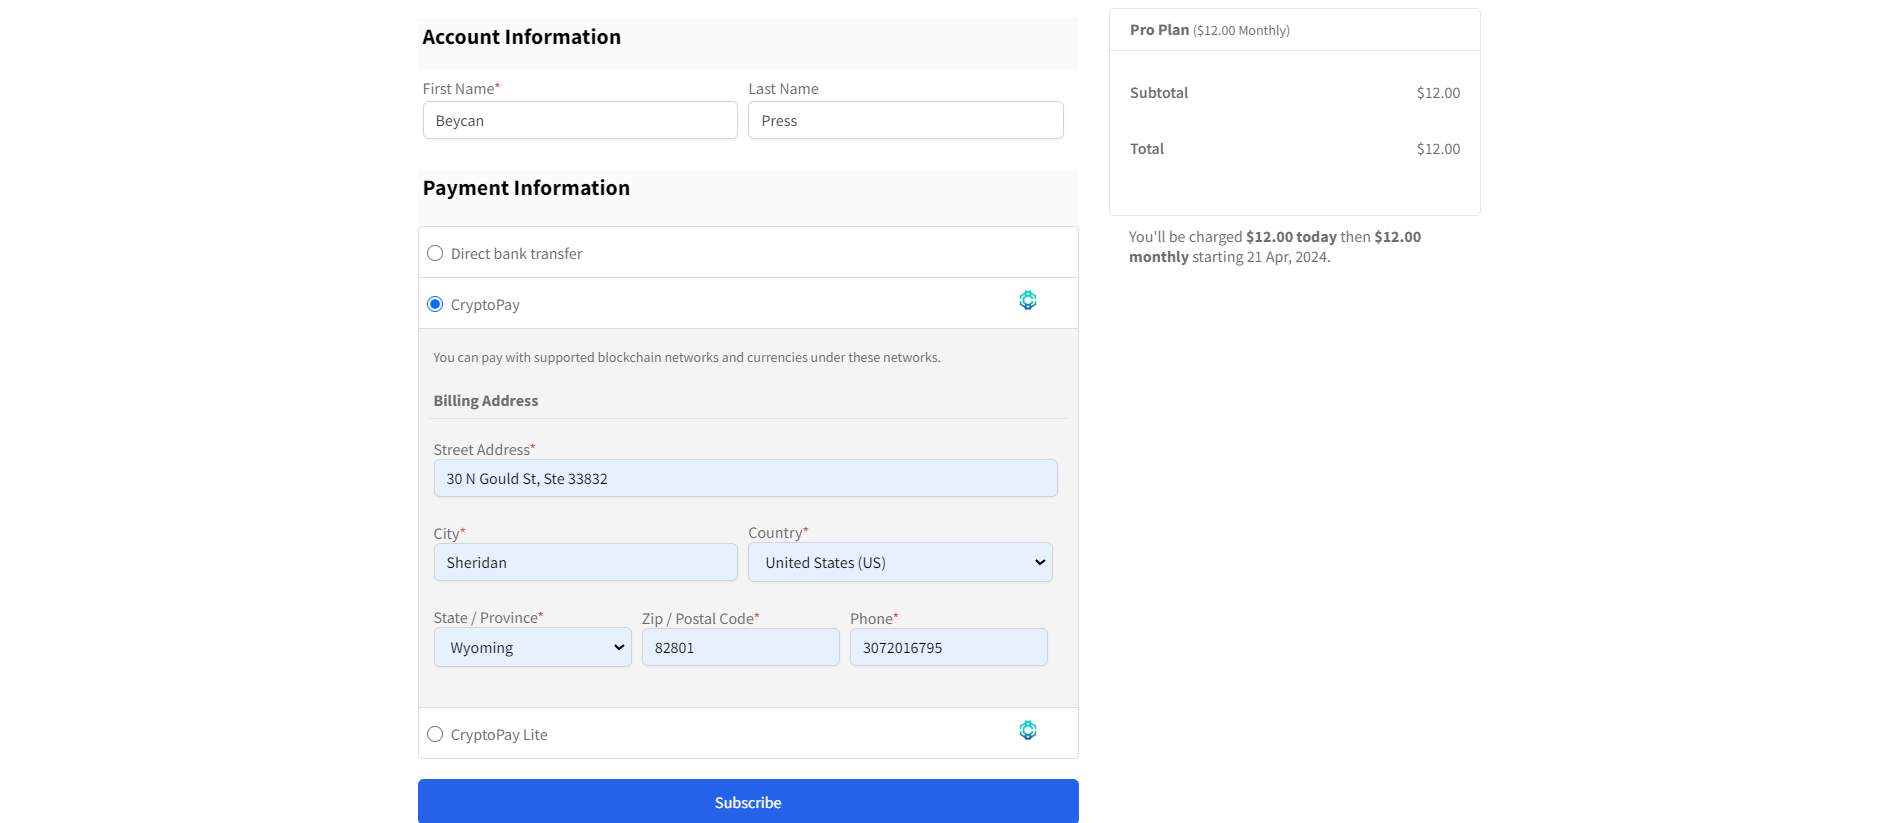
Now that your checkout page is set up, you can link to it from any of your pages. For instance, you might want to link to it from your pricing page or add it to your website’s navigation menu.
How To Restrict Access To Your Premium Content
ProfilePress provides numerous options for controlling user access to your content. Here are two particularly useful methods:
How To Restrict Access To Your Premium Posts and Pages
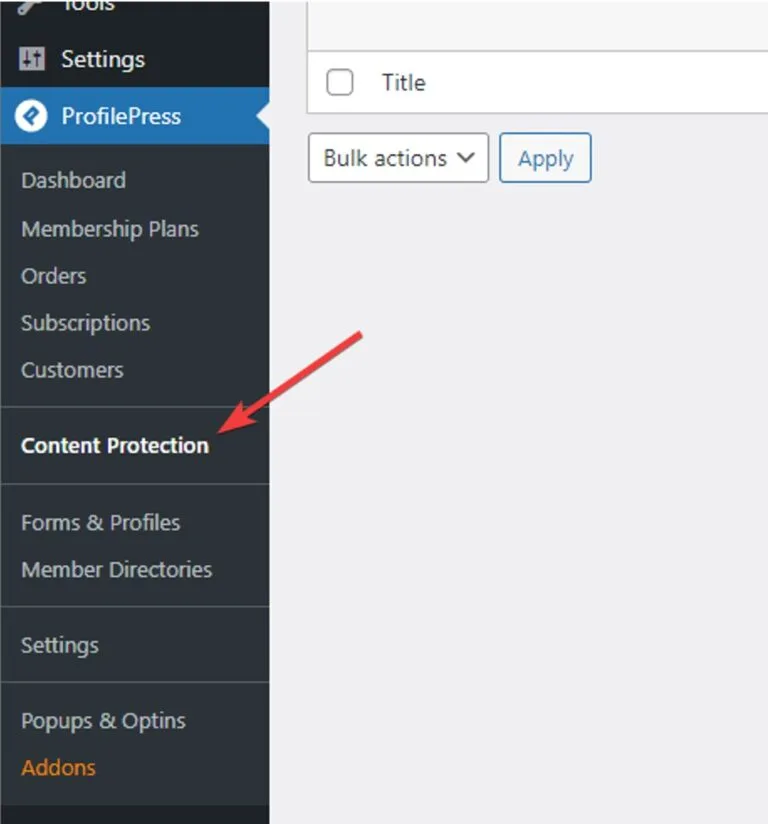
Begin by accessing the Content Protection section within ProfilePress:
Next, you’ll see the Add Protection Rule page,
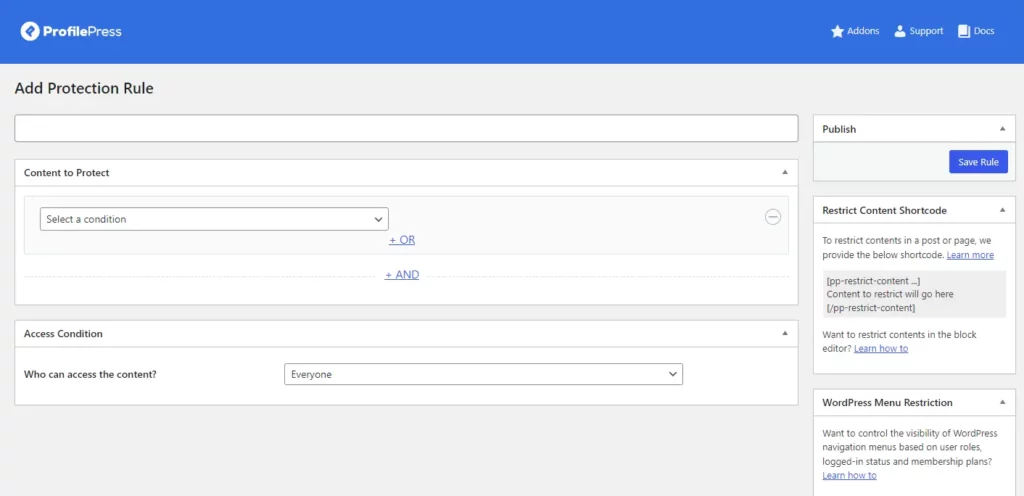
To set up your rule effectively, start by giving it a descriptive name and selecting the content you want to protect.
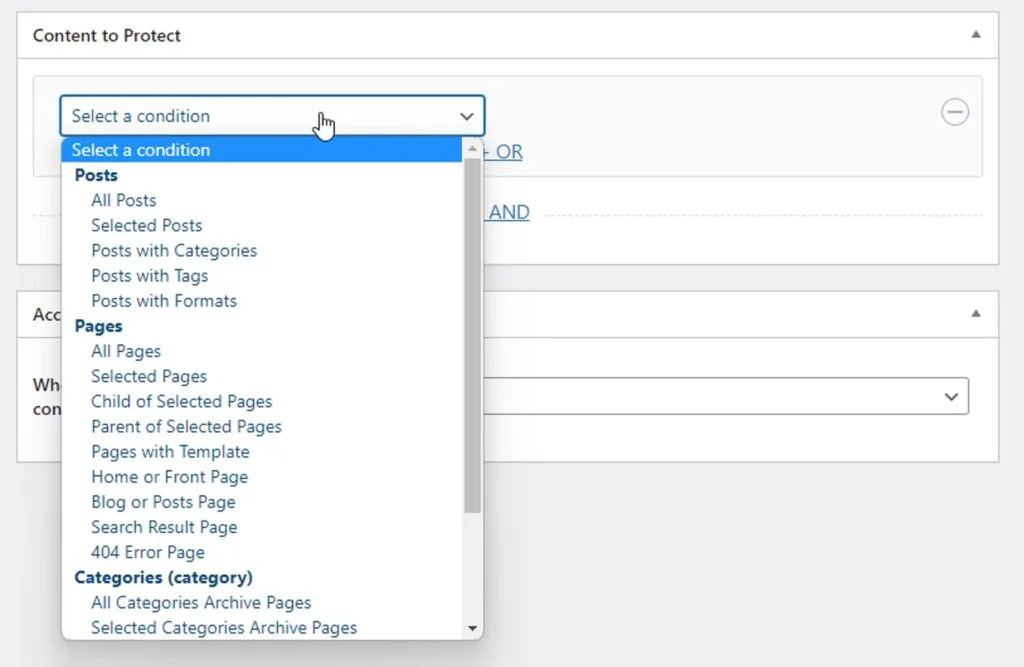
ProfilePress provides various conditions, allowing you to restrict posts based on categories, tags, archives, formats, and more. You can further refine your requirement using the AND and OR relations.
After defining the conditions, you need to determine who can access the content. You have three options: everyone, logged-in users, and logged-out users.
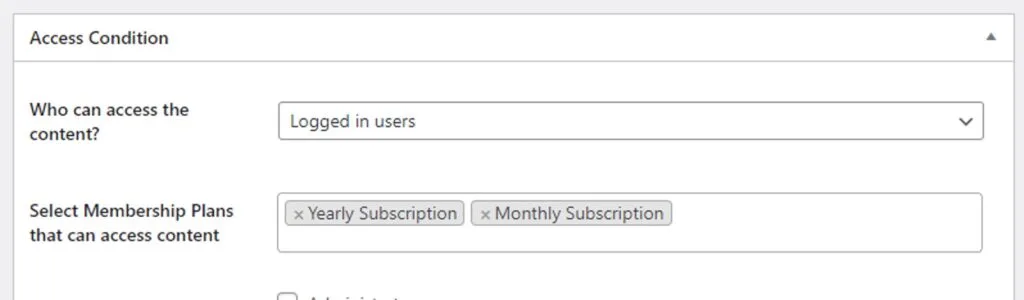
Select Logged In Users from the drop-down menu. Then, input the names of the Membership Plans you wish to grant access to.
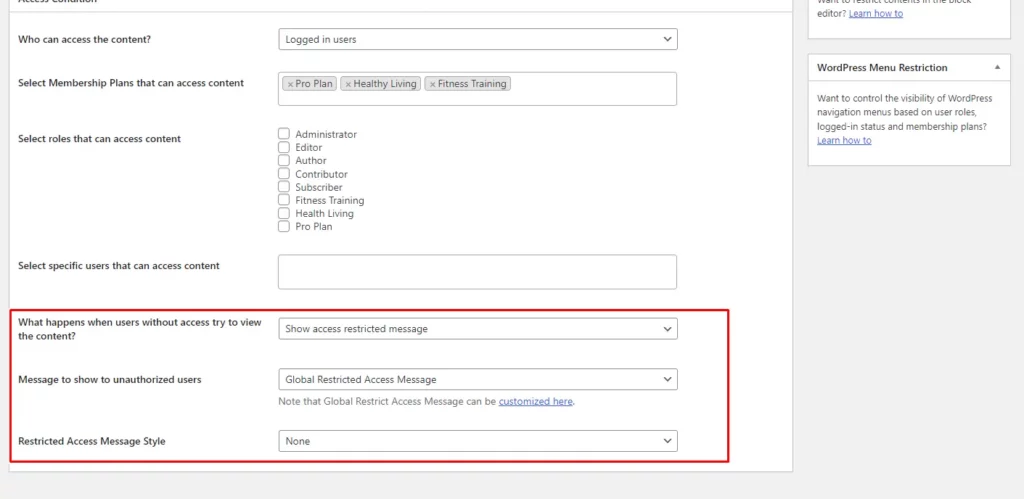
Next, define the action if an unauthorized user tries to access the protected content. You can display a message or redirect the user to a different page. For example, you might show a brief excerpt of the post followed by a message notifying users of restricted access and providing guidance on what steps they can take to gain access.
Once you’ve configured your settings, save the content protection rule by clicking the Save Rule button on the right sidebar.
Now, whenever you publish a post assigned to a restricted category, users lacking the necessary authorization will be prompted to register on the website.
How To Restrict Access To Parts of a Page’s Content
ProfilePress allows you to control user access to specific parts of a page’s content, enabling you to offer teaser content to your website visitors. This strategy is commonly seen on sites like The New York Times, where readers can preview a few paragraphs before being prompted to subscribe for full access.
To implement this, you can utilize ProfilePress’s content restriction shortcode. Simply enclose the content you wish to hide from non-subscribers within the opening and closing tags of this shortcode:
[pp-restrict-content]THIS CONTENT WILL NOT BE VISIBLE TO FREE USERS[/pp-restrict-content]
Each plan created in ProfilePress is assigned a unique ID, which you can find on the Membership Plans page under ProfilePress settings.
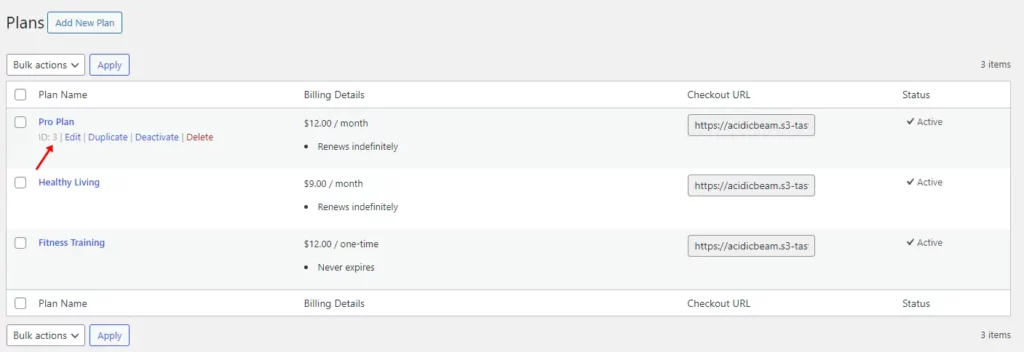
To specify which plans have access to particular content, you can simply enter their IDs like this:
[pp-restrict-content plans=”3″]THIS TEXT WILL NOT BE VISIBLE TO FREE USERS[/pp-restrict-content]
In the example above, “3” represents the ID of the plan granting access to this content. You can include multiple IDs, separated by commas if needed.
If this method seems too complex, there’s a simpler alternative for content restriction. You can utilize the Conditional Blocks plugin. Its built-in ProfilePress integration makes it easy to restrict access to content.
ProfilePress offers various other options for content restriction, including:
- Limiting visibility of navigation menus
- Controlling the visibility of content within Beaver Builder
- Checking for active subscriptions in your PHP code
- Restricting access to your entire website with a single click
- Managing the visibility of Elementor’s content.
These options provide flexibility in tailoring access controls to suit your specific needs.
It’s Time to Set Up a Paid Membership Site
Congratulations! You’ve concluded our guide for setting up a paid membership site. By now, you’ve learned about the benefits of creating a paid membership site, from generating recurring revenue to fostering a loyal community around your brand or niche.
Throughout this guide, we showed you how to create a paid membership site using the ProfilePress plugin, an all-in-one solution for creating and managing membership levels, restricting content, and seamlessly integrating payment methods.
Now that you have the knowledge and tools, it’s time to take action and set up your own paid membership site. Whether you’re offering premium content, exclusive services, or community engagement opportunities, a paid membership site provides a valuable opportunity to monetize your expertise and build a sustainable income stream online.
So, what are you waiting for? Get ProfilePress today!


